
A great way to keep your Chapin sprayer working efficiently is to clean it regularly. A properly maintained sprayer will give you better performance and a longer life span. But what do you need to know before you start cleaning? This article will help you figure out the steps that need to be taken to keep your Chapin sprayer clean.


How do you clean the Chapin sprayer quickly?
- Pour a gallon of white vinegar into the sprayer.
- Add 1 cup of baking soda to the vinegar.
- Turn on the sprayer and let it run until the mixture starts bubbling and becomes thickened.
- Pour the mixture through a strainer into a container.
- Rinse the sprayer with water and dry it off.
- Boil 1/4 cup of vinegar in a saucepan on the stove for one minute and pour it into the sprayer to finish cleaning. They are not recommended unless you have very clean water. The expensive model says they put lemon and apple cider peroxide, so they claim this will neutralize any tough stains or rust, which is not valid, but I’m still going to try!
- Before each use, add 10 drops of peppermint oil to the sprayer and fill it with water.
Note: the flavor of your spray dilutes once you put it in a bottle, so rinse it out before filling it up again!
Disclaimer: I am unsure if this works for rust cleaning, but it’ll smell yummy!
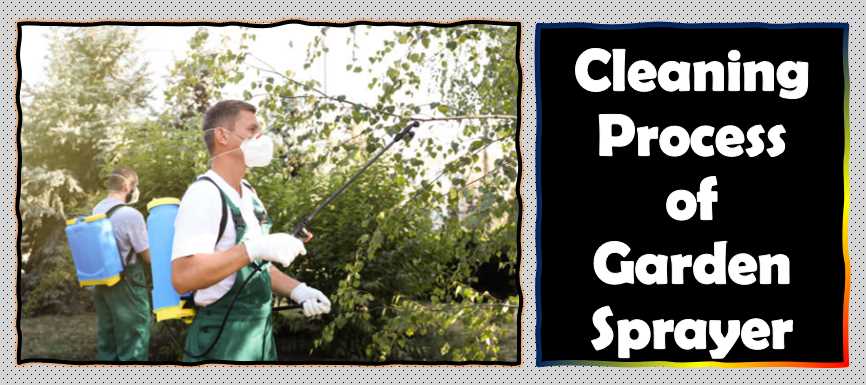
Cleaning Process
My brother introduced us to the Backpack Sprayer method (I’ll call it to backpack sprayer now). We prepped with them and even had fun before going out for a few days at various military schools/associations.
To clean your Chapin backpack sprayer, follow these simple steps:
- Remove the cap and filter.
- Pour a small amount of water into the tank.
- Swirl the water around to mix it up.
- Pour the water out of the tank and replace the cap and filter.
- Wipe down any dirt or debris that may have accumulated on the machine’s exterior with a damp cloth.
- Place the tank on tracing paper and gently wring out all water.
- Clean any dirt with detergent, rinse in warm soapy water, and allow 5 to 10 minutes to air dry before reusing your sprayer!
Check for clogs and clear any that you find.
Chapin sprayers are a valuable tool for spraying pesticides, herbicides, or other chemicals. They are easy to use and can be used on various plants.
However, they can become clogged with debris over time, making them difficult to use. If this happens, you’ll need to clear the clogs using one of the following methods:
- Use plunger: Plunging the plunger down into the sprayer will dislodge any obstructions and clear the sprayer. Be sure to get all of the clogs out!
- Use boiling water: Boil some water and pour it into the sprayer. Turn on the heat and wait until the water reaches a boil. Pour it over the clog and wait until it’s gone before using the sprayer again.
- Use vacuum cleaner: Put on rubber gloves and place the vacuum cleaner over the clog. Turn it on and wait until it has pulled all debris out.
How do you clean a pesticide sprayer?
- To clean a pesticide sprayer, pour dish soap into the tank and turn on the water. Agitate the soap with your hand until it is completely dissolved. Then, pour enough cold water to cover the machine and let it run for about five minutes. Finally, drain the water and rinse the machine with fresh water.
- To clean a pesticide sprayer with vinegar, mix one cup of white vinegar with two cups of warm water in a spray bottle. Spray the solution onto the parts of the sprayer that you want to clean and let it sit for about five minutes. Rinse off the sprayed area with cool water and dry it off.
How to Clean Your Hand Pump Sprayer?
- To clean your hand pump sprayer, remove the plastic cap and fill the water tank with warm water. Swish the water around inside the tank to loosen any debris. Pour out the dirty water and replace the cap.
- Disconnect the hose from the pump and pour a pot of hot water into the sink. Connect the hose to the pump and turn it on to full pressure. Hold the trigger until all the water has been discharged from the hose.
- Dispose of any waste by pouring it into a trash can or using a plunger. Rinse off the sprayer’s parts with cool water and dry them off thoroughly before reassembling them.
How to release pressure in Chapin Sprayer?
With the tank upside down, hold one end of the wand firmly in your hand and unscrew the other from the sprayer head.
Hold both ends of the wand together and twist them around to form a tight U-shape. Screw the U-shape back onto the head of the sprayer. You’re now ready to start spraying!
Storing and maintaining Process
Make sure your sprayers are always kept in a cool, dry place and not left outside in the sun or where they will freeze cold temperatures before freezing weather.
Disconnect the hoses from the sprayer. Store in a plastic bag. Do not store with gas, oil, or other flammable material.
NOTE: You should use this anti-liquid discharge device for preventing spills and leaks of a sprayer that has been opened up (unscrewed). The purpose is to prevent liquid from spilling when you unscrew it from its place because many components will be damaged if they are not kept completely dry.
Make sure you check the hose, wand, pump, and tank for wear and damage at least once a month or when it is used. If any defects are found, they should be fixed immediately because your safety might depend on them working properly.
Final Words:
Chapin sprayer is a popular choice for many home gardeners. It’s easy to use and efficient but can be challenging to clean properly. If you’re looking for a good cleaning kit, check out our guide on how to clean a Chapin sprayer.
Here are some of the steps we recommend: Cleaning your garden equipment regularly will help it last longer and save you money in the long run. Before using your sprayer again, clean it thoroughly by disassembling the parts and removing any debris that might have accumulated over time. Use an approved cleaner on all sprayer parts before reassembling it to get as much use out of it as possible.

I love gardening and hope you enjoy reading my post as much as I enjoy writing it. I focus on plant-based living and believe that you will be healthier and happier by incorporating more plant-based foods into your diet. By providing helpful tips and advice on everything from garden design to growing techniques, I want to help make gardening easier for everyone.
Pingback: 10 Best Garden Sprayer: Reviews in 2022: Buyers Guide & Tips
Pingback: CHAPIN 1-Gallon Plastic Tank Sprayer: Review with Infographic
Pingback: Chapin 4 Gallon Backpack Sprayer: Reviews in 2022
Pingback: Why You Should Use Roundup 2-Gallon Sprayer: Instructions, Diagram, Manual, Replacement Parts Explained
Pingback: 5 Top Benefits Of Using Solo 462 Garden Sprayer: Video Guide for Beginners
Pingback: Chapin 4 Gallon Backpack Sprayer - The Best Sprayer For Your Home Garden
Pingback: 10 Most Popular Sprayers for Gardeners With Buying Advice and Video Explained
Pingback: How to Use Chapin Home and Garden Sprayer: 7 Tips To Follow
Pingback: What are the Advantages and Disadvantages of using Ortho Dial N Spray Hose End Sprayer? Complete Video Guide