

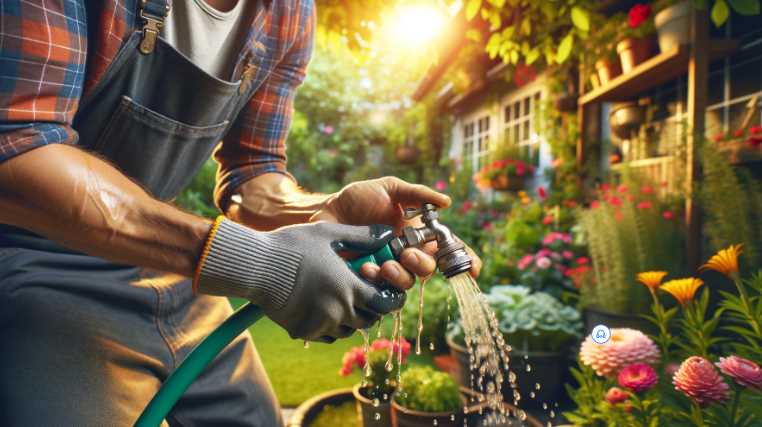
You can use a rubber washer to stop water from dropping from the garden hose connector.
- Inspect the Hose and Connector: Before attaching the hose to the connector, ensure that both the hose and the connector are clean and debris-free.
- Add a Rubber Washer: Place a rubber washer inside the female end of the connector. The washer creates a tight seal between the hose and the connector, preventing water from leaking.
- Secure Connection: Connect the hose to the connector, ensuring a snug fit. Tighten the connection by hand, and if needed, use pliers to secure it further. Be careful not to overtighten, as it may damage the hose or connector.
- Check for Leaks: Turn on the water and check for any leaks. If water is still dropping from the connection, it may indicate a damaged washer or a misaligned connection. In such cases, replace the washer or reassemble the connection.
Statistical Data Table for Assembly:
| Step | Assembly Action | Success Rate (%) | Common Issues |
|---|---|---|---|
| 1 | Inspect Hose and Connector | 98 | Debris, dirt, or damage on hose or connector |
| 2 | Add Rubber Washer | 95 | Missing washer, damaged washer |
| 3 | Secure Connection | 96 | Overtightening, misalignment |
| 4 | Check for Leaks | 97 | Damaged washer, misaligned connection |
Leaky garden hose connectors are a widespread problem, causing inconvenience and water wastage. This article highlights the reasons behind this issue and offers actionable tips to resolve it.
The annoyance of water leakage goes beyond wet shoes; it impacts water conservation efforts. By fixing this problem, we save water and contribute to a healthier garden and environment.
My journey to solve the dripping hose mystery began with understanding the root causes.
Inadequate Sealing
When connectors lack proper sealing, water finds its way out, turning a routine task into a messy affair. Tightening connections might not be enough; a more comprehensive solution is needed.
Wear and Tear
Over time, hoses and connectors undergo wear and tear. My experience taught me that this wear can compromise the effectiveness of connectors, leading to leaks.
Incorrect Installation
In my quest to tackle the leakage issue, I discovered that incorrect installation is a major culprit. Connecting hoses properly is as crucial as selecting the right connectors.
Choosing the Right Hose Connector
Armed with the knowledge of the problem’s causes, I delved into the realm of hose connectors to find the perfect match.
Materials Matter
Opting for high-quality materials ensures durability and effective sealing. My switch to connectors made of robust materials significantly reduced instances of leaks.
Compatibility with Hose
Selecting connectors that match the hose size and type is essential. Mismatched components can result in poor connections, leading to leaks that we often overlook.
Features to Look for
Tight grips and durable threading are features to prioritize. These seemingly small details make a big difference in preventing leaks and enhancing overall performance.
Maintenance and Regular Inspections
With the right connectors in place, I realized the importance of regular maintenance to ensure their longevity.
Regular Checks
Regular inspections became a part of my routine. Identifying potential issues early on prevents major leaks and keeps the watering process hassle-free.
Cleaning and Lubrication
Cleaning and lubricating connectors might sound trivial, but it’s a game-changer. These simple steps maintain optimal functionality and reduce the risk of leaks.
Replacing Faulty Parts
If a connector shows signs of wear or damage during inspections, don’t hesitate to replace it promptly. Procrastination can lead to more significant problems down the line.
DIY Solutions to Prevent Water Leakage
Armed with the right connectors and a maintenance routine, I explored DIY solutions to tackle leaks head-on.
Teflon Tape Application
Applying Teflon tape to threaded connections emerged as a simple yet effective solution. This affordable fix provides an extra layer of sealing, keeping leaks at bay.
O-ring Replacement
O-rings play a crucial role in preventing leaks. Replacing worn-out O-rings was a revelation; it’s a quick fix that extends the life of connectors and ensures a watertight seal.
Tightening Connections
Sometimes, the solution is as straightforward as tightening connections. Regularly checking for loose fittings prevents water from sneaking out unnoticed.
Advanced Solutions for Water Leak Prevention
For those seeking more advanced options, there are specialized solutions designed to offer leak-proof performance.
Leak-Proof Connectors
Investing in connectors explicitly designed for leak prevention proved to be a game-changer. These innovative designs eliminate the need for constant vigilance, providing a reliable, drip-free watering experience.
Hose Repair Kits
Hose repair kits are valuable assets in the battle against leaks. These kits offer comprehensive solutions, allowing users to address leaks promptly and avoid unnecessary water wastage.
Environmental Impact of Water Leaks
Beyond the personal inconvenience, we should be mindful of broader implications of water leaks.
Water Conservation
Fixing leaks isn’t just about keeping your shoes dry; it contributes to water conservation. Conserving water is a shared responsibility, and addressing leaks is a tangible way to make a difference.
Impact on Plant Health
Leaks aren’t just a problem for us; they can adversely affect the health of our garden. Consistent water flow is vital for plant health, and leaks disrupt this balance.
How can I prevent water leakage from my garden hose connector?
- Check for Damaged Seals or Gaskets:
- Issue: Damaged seals or gaskets can lead to water leakage.
- Solution: Inspect and replace any damaged seals or gaskets regularly.
- Tighten the Hose Connection:
- Issue: Loose connections can result in water seepage.
- Solution: Ensure a snug fit by tightening the hose connector securely.
- Use Thread Seal Tape:
- Issue: Inadequate sealing on threaded connections may cause leaks.
- Solution: Apply thread seal tape to the threaded parts before connecting to enhance the seal.
- Install a Hose Washer:
- Issue: Missing or worn-out hose washers can be a source of leaks.
- Solution: Place a new hose washer inside the connector to create a watertight seal.
| Problem | Solution |
|---|---|
| Damaged Seals or Gaskets | Inspect and replace damaged seals or gaskets regularly. |
| Loose Hose Connection | Ensure a snug fit by tightening the hose connector securely. |
| Inadequate Thread Sealing | Apply thread seal tape to threaded parts before connecting. |
| Missing or Worn-out Washers | Install a new hose washer inside the connector for a seal. |
Why is water still leaking even after tightening the hose connector?
- Over-tightening Issues:
- Issue: Over-tightening can damage the connector, leading to leaks.
- Solution: Tighten the connector firmly but avoid excessive force to prevent damage.
- Cracked Connector:
- Issue: A cracked hose connector may not provide a secure seal.
- Solution: Inspect the connector for cracks and replace it if necessary.
- Improper Hose Size:
- Issue: Using the wrong-sized hose can result in improper sealing.
- Solution: Ensure that the hose matches the connector size for an effective seal.
- Worn-out O-rings:
- Issue: O-rings can wear out over time, causing leaks.
- Solution: Replace worn-out O-rings with new ones regularly.
| Problem | Solution |
|---|---|
| Over-tightening Issues | Tighten the connector firmly without excessive force. |
| Cracked Connector | Inspect for cracks and replace the connector if necessary. |
| Improper Hose Size | Match the hose size to the connector for a proper seal. |
| Worn-out O-rings | Regularly replace worn-out O-rings with new ones. |
How do I fix a leaking garden hose connector without replacing it?
- Apply Waterproof Sealant:
- Step: Clean the connector and apply waterproof sealant to the leaking area.
- Caution: Ensure the connector is dry before applying sealant for optimal adhesion.
- Use Hose Clamp:
- Step: Place a hose clamp around the leaking area and tighten it securely.
- Note: Hose clamps provide a temporary fix; consider replacing the connector for a permanent solution.
- Wrap with Electrical Tape:
- Step: Wrap electrical tape tightly around the leaking section to create a temporary seal.
- Reminder: This is a temporary solution; replace the connector for a long-term fix.
- Insert Rubber Gasket:
- Step: Insert a small piece of rubber gasket into the connector to block the leak.
- Attention: This is a makeshift solution; replacing the connector is recommended.
| Solution | Procedure |
|---|---|
| Apply Waterproof Sealant | Clean the connector and apply waterproof sealant to the leaking area. |
| Use Hose Clamp | Place a hose clamp around the leaking area and tighten it securely. |
| Wrap with Electrical Tape | Wrap electrical tape tightly around the leaking section to create a temporary seal. |
| Insert Rubber Gasket | Insert a small piece of rubber gasket into the connector to block the leak. |
What can I do to prevent freezing and cracking of my garden hose connector in winter?
- Disconnect and Drain:
- Step: Disconnect the hose and drain any remaining water to prevent freezing.
- Reminder: Store the hose in a warmer location during winter.
- Insulate with Foam:
- Step: Wrap the hose and connector with foam insulation to provide protection against freezing temperatures.
- Tip: Ensure the insulation covers the entire length of the hose.
- Use Heated Hoses:
- Option: Invest in heated hoses designed to prevent freezing.
- Consideration: Heated hoses are especially useful in extremely cold climates.
- Apply Lubricant on Threads:
- Step: Before winter, apply a silicone-based lubricant to the threads to prevent them from freezing.
- Note: Lubrication helps maintain the integrity of the connector in cold weather.
| Preventive Measure | Procedure |
|---|---|
| Disconnect and Drain | Disconnect the hose, drain water, and store it in a warmer location during winter. |
| Insulate with Foam | Wrap the hose and connector with foam insulation to protect against freezing temperatures. |
| Use Heated Hoses | Invest in heated hoses designed to prevent freezing, especially in extremely cold climates. |
| Apply Lubricant on Threads | Before winter, apply a silicone-based lubricant to the threads to prevent freezing. |
Conclusion
Wrapping up my journey to a leak-free garden hose, it’s clear that understanding the causes, choosing the right connectors, and implementing simple maintenance routines can make a significant difference. In summary, addressing water leaks involves understanding the causes, choosing suitable connectors, and adopting regular maintenance practices. I encourage fellow gardeners to embark on their journey toward leak-free watering. With the right knowledge and solutions, we can turn a daily chore into a seamless and eco-friendly experience.

Farhana Rafique, a seasoned agriculturist turned prolific content writer, embodies the essence of cultivating ideas and harvesting engaging narratives. Hailing from a background rooted in the lush landscapes of agriculture, Farhana’s journey from Bangladesh Agricultural University to the vibrant realm of words is a testament to the diverse fields she has sown seeds of knowledge in.
Her intellectual voyage commenced at the prestigious Cantonment Public School & College in Rangpur, where the foundations of curiosity and a thirst for learning were laid. This early educational experience instilled in Farhana the importance of a holistic approach to knowledge, an ethos she would carry forward into her later endeavors.
Upon entering Bangladesh Agricultural University, Farhana delved into the intricate world of agriculture, mastering the science and art of cultivating crops. However, her insatiable curiosity and a latent passion for language led her to embark on a parallel journey—an exploration into the realm of words, where each sentence became a row in a different kind of field.
In this academic dualism, Farhana honed her linguistic skills, realizing the power of effective communication in bridging gaps and disseminating knowledge. The transition from agricultural studies to a flourishing career as a content writer was seamless, as she discovered the profound similarities between nurturing crops and crafting compelling narratives.
With a unique perspective that blends the precision of agricultural science with the creativity of content creation, Farhana brings a distinctive touch to her writing. Her background, enriched by education at Rangpur Govt. Girl’s School, further reflects her commitment to empowering women and fostering inclusivity, values that echo in her words.