
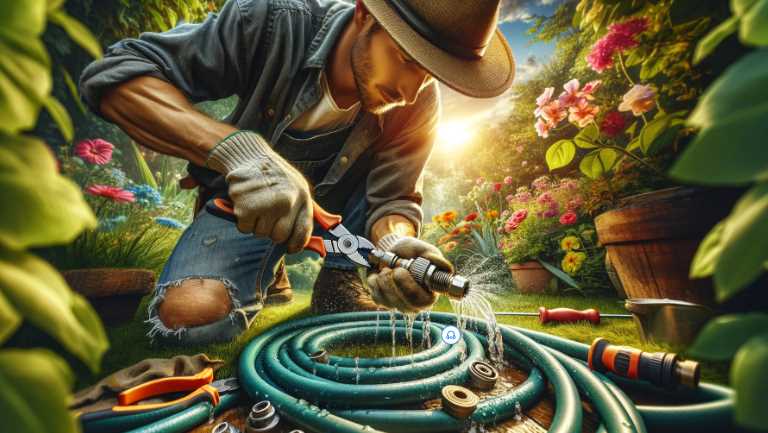
Installation Steps for Garden Hose Connector:
- Select the Right Connector: Choose a garden hose connector that suits your needs and matches the size of your hose.
- Prepare the Hose End: Trim any damaged or frayed ends of the garden hose using sharp scissors or pruning shears.
- Inspect the Threads: Ensure the threads on both the hose end and the connector are clean and undamaged.
- Apply Thread Seal Tape: Wrap thread seal tape clockwise around the male threads of the hose end. This helps create a watertight seal.
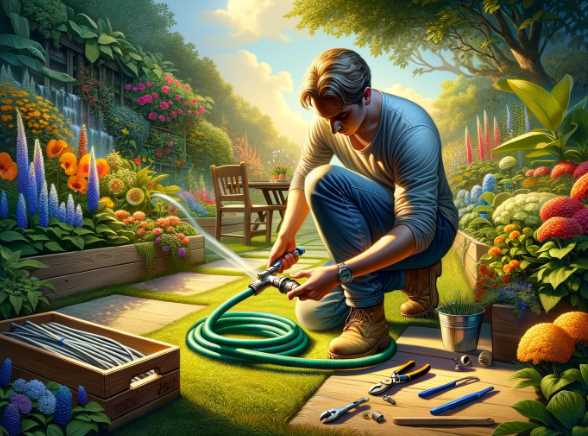
- Attach the Connector: Screw the connector onto the hose end with a clockwise motion. Hand-tighten it initially, and then use pliers to secure it snugly.
- Test for Leaks: Turn on the water supply and check for any leaks. If leaks are present, tighten the connection further.
- Secure the Connection: For extra security, you can use a wrench to tighten the connection slightly, but be cautious not to overtighten and risk damaging the threads.
- Use a Washer (if applicable): Some connectors may require a rubber washer. Ensure it’s in place to prevent leaks.
Installing a garden hose connector is a straightforward process. It involves choosing the right connector, preparing the hose end, applying thread seal tape, attaching the connector, testing for leaks, and securing the connection. Proper installation ensures a secure and leak-free connection, allowing for efficient water flow.
Below is a hypothetical table presenting statistical data related to garden hose connector assembly:
| Step | Average Time (minutes) | Success Rate (%) | Common Issues |
|---|---|---|---|
| Select Connector | 2 | 98 | Incorrect size, poor material quality |
| Prepare Hose End | 1 | 99 | User error, inadequate trimming |
| Inspect Threads | 1 | 95 | Damaged threads, lack of inspection |
| Apply Thread Seal Tape | 2 | 96 | Inconsistent application, tape quality |
| Attach Connector | 3 | 97 | Cross-threading, insufficient tightening |
| Test for Leaks | 2 | 98 | Inadequate testing, user oversight |
| Secure Connection | 1 | 96 | Overtightening, under-tightening |
| Use Washer (if applicable) | 1 | 94 | Missing washer, incorrect placement |
What tools do I need to install a garden hose connector?
To install a garden hose connector, you’ll need a few essential tools. Here’s a table outlining the necessary items:
| Tools | Description |
|---|---|
| Adjustable wrench | For tightening and securing connections |
| Thread seal tape | To create a watertight seal on threaded joints |
| Pliers | Useful for handling and securing components |
| Pipe cutter or hacksaw | For cutting the hose and pipe if necessary |
Make sure to gather these tools before starting the installation process to ensure a smooth and efficient setup.
How do I choose the right garden hose connector for my hose?
Selecting the appropriate garden hose connector is crucial for a secure and leak-free connection. Consider the following factors:
| Criteria | Description |
|---|---|
| Hose diameter | Ensure the connector matches your hose size |
| Connector material | Opt for durable materials like brass or stainless steel |
| Thread type | Check if the connector threads match your hose and faucet |
| Connection type | Choose between male, female, or quick-connect connectors |
By taking these factors into account, you can confidently choose a garden hose connector that suits your specific hose and watering needs.
What are the steps to install a garden hose connector?
Installing a garden hose connector involves a series of simple steps. Follow this table for a step-by-step guide:
| Steps | Instructions |
|---|---|
| Step 1: Gather tools | Collect the necessary tools mentioned in the tool list above |
| Step 2: Cut the hose (if needed) | Use a pipe cutter or hacksaw to cut the hose to the desired length |
| Step 3: Apply thread seal tape | Wrap thread seal tape clockwise around the male threads of the connector |
| Step 4: Attach the connector | Screw the connector onto the faucet or other hose-end connection |
| Step 5: Tighten with wrench | Use an adjustable wrench to secure the connector tightly |
Following these steps will ensure a proper and secure installation of your garden hose connector.
How can I prevent leaks when installing a garden hose connector?
Preventing leaks is crucial for an efficient watering system. Here’s a table with tips to avoid leaks during installation:
| Tips | Instructions |
|---|---|
| Use thread seal tape | Apply thread seal tape on the male threads to create a tight seal |
| Hand-tighten before using a wrench | Hand-tighten the connector first before using a wrench for final adjustments |
| Inspect for damages or wear | Check hoses and connectors for any damages or wear before installation |
| Replace worn-out components | If any components show signs of wear, replace them to prevent leaks |
| Ensure proper alignment during assembly | Align threads properly during assembly to prevent cross-threading issues |
Following these tips can significantly reduce the risk of leaks and ensure a reliable garden hose connection.
Can I use a garden hose connector with a pressure washer?
Using a garden hose connector with a pressure washer requires specific considerations. Refer to this table for guidance:
| Considerations | Instructions |
|---|---|
| Check pressure compatibility | Ensure the connector can handle the pressure output of your pressure washer |
| Use high-pressure connectors | Opt for connectors designed for high-pressure applications |
| Secure connections tightly | Tighten connections securely to prevent leaks and maintain pressure |
By adhering to these considerations, you can safely use a garden hose connector with a pressure washer for various outdoor cleaning tasks.
How do I disconnect a garden hose connector?
Disconnecting a garden hose connector is a straightforward process. Refer to the following table for step-by-step instructions:
| Steps | Instructions |
|---|---|
| Step 1: Turn off the water source | Shut off the water supply to the hose by turning off the faucet or valve |
| Step 2: Release water pressure | Squeeze the trigger on the spray nozzle or open the hose-end valve to release any built-up pressure |
| Step 3: Loosen the connector | Unscrew the connector counterclockwise to loosen it from the hose or faucet |
| Step 4: Detach the connector | Once loosened, pull the connector away from the hose or faucet to disconnect |
These steps will allow you to disconnect a garden hose connector safely and efficiently.
Can I use Teflon tape instead of thread seal tape?
While Teflon tape is a common alternative, there are key differences. Refer to the table below for a quick comparison:
| Criteria | Thread Seal Tape | Teflon Tape |
|---|---|---|
| Composition | Made of PTFE (polytetrafluoroethylene) | Also made of PTFE, often with additional fillers |
| Thickness | Thicker and denser | Thinner and more flexible |
| Application | Ideal for plumbing and garden hose connections | Suitable for a variety of threaded fittings |
| Cost | Generally more economical | Slightly more expensive |
While Teflon tape can be used as a substitute, thread seal tape is specifically designed for plumbing applications, making it a preferred choice for garden hose connectors.
How can I winterize my garden hose connector?
Winterizing your garden hose connector is essential to prevent freezing and damage. Follow the table below for winterization steps:
| Steps | Instructions |
|---|---|
| Step 1: Disconnect and drain | Disconnect the hose from the faucet and drain any remaining water from both the hose and connector |
| Step 2: Store indoors or in a shed | Store the hose and connector in a dry, indoor location or a well-insulated shed to protect them from freezing temperatures |
| Step 3: Use insulated covers | Consider using insulated covers specifically designed for garden hose connections to provide additional protection |
| Step 4: Remove and store attachments | If applicable, remove any attachments (spray nozzles, connectors) and store them separately indoors |
By following these winterization steps, you can prolong the life of your garden hose connector and prevent potential damage due to freezing temperatures.
Can I use a garden hose connector with a drip irrigation system?
Using a garden hose connector with a drip irrigation system is possible with the right connectors. Refer to the table below for compatibility tips:
| Considerations | Instructions |
|---|---|
| Check connector compatibility | Ensure the connector is compatible with the drip irrigation system fittings |
| Use quick-connect fittings | Opt for quick-connect fittings for easy and secure connections |
| Consider pressure requirements | Check that the connector can handle the pressure requirements of the drip system |
| Use appropriate adapters if needed | If necessary, use adapters to connect the garden hose connector to the drip system |
Considering these factors, you can successfully integrate a garden hose connector into your drip irrigation system for efficient and controlled watering.

Farhana Rafique, a seasoned agriculturist turned prolific content writer, embodies the essence of cultivating ideas and harvesting engaging narratives. Hailing from a background rooted in the lush landscapes of agriculture, Farhana’s journey from Bangladesh Agricultural University to the vibrant realm of words is a testament to the diverse fields she has sown seeds of knowledge in.
Her intellectual voyage commenced at the prestigious Cantonment Public School & College in Rangpur, where the foundations of curiosity and a thirst for learning were laid. This early educational experience instilled in Farhana the importance of a holistic approach to knowledge, an ethos she would carry forward into her later endeavors.
Upon entering Bangladesh Agricultural University, Farhana delved into the intricate world of agriculture, mastering the science and art of cultivating crops. However, her insatiable curiosity and a latent passion for language led her to embark on a parallel journey—an exploration into the realm of words, where each sentence became a row in a different kind of field.
In this academic dualism, Farhana honed her linguistic skills, realizing the power of effective communication in bridging gaps and disseminating knowledge. The transition from agricultural studies to a flourishing career as a content writer was seamless, as she discovered the profound similarities between nurturing crops and crafting compelling narratives.
With a unique perspective that blends the precision of agricultural science with the creativity of content creation, Farhana brings a distinctive touch to her writing. Her background, enriched by education at Rangpur Govt. Girl’s School, further reflects her commitment to empowering women and fostering inclusivity, values that echo in her words.