
It’s easy to make a garden apron for beginners. All you need are basic materials, including an old T-shirt or sweatshirt, bias tape, and ribbon. Begin by cutting the T-shirt or sweatshirt into strips about 18 inches long. You’ll also need to cut off the sides of the shirt to be just slightly above your hipbones when wearing it as a skirt.
Next, baste one end of each strip to one side of the T-shirt/sweatshirt fabric using bias tape. Once you’ve done this, tie each end in a knot close to but not on your skin. Finally, add some pretty ribbons around the waistline, and voila! Your very own garden apron is ready to go!
- Merrett, Robert (Author)
- English (Publication Language)
- 128 Pages - 02/01/2009 (Publication Date) - Cima Books (Publisher)
Last update on 2024-10-21 / Affiliate links / Images from Amazon Product Advertising API
Gardeners know that a good garden is more than just plants and dirt; it’s also a place to relax and get your hands dirty.
With that in mind, we’ve put together a list of easy tasks you can complete while wearing your gardening apron.
From weeding to planting, these tasks will help you keep your garden looking good and produce fresh fruits and vegetables all season long!
How to make a garden apron in 10 Minutes?
Whether a beginner or an experienced gardener, making a garden apron can be fun and easy. All you need is some fabric, some buttons, and thread. Here’s how to do it:
1. Begin by cutting your fabric into the desired shape (you may want to make it larger than necessary to put it on quickly).
2. Place the fabric onto your work surface, where you will sew it together. Pin all sides and bottom together before sewing them up along the top with a zigzag stitch or a standard straight stitch. Ensure that there are no gaps between the fabrics because this will cause water droplets to stay inside your garment instead of being absorbed by the cotton fibers!
3. Once everything is sewn together, turn it over so that the seam is facing down and slowly start adding buttons around every inch (try not to add too many at once – they’ll protrude outwards). When finished, hemming isn’t necessary because any excess material won’t be hanging off your garment!
Now you’re ready for summertime gardening in style!
Five Steps to Make Your Own Garden Apron
There are plenty of ways to bring the garden indoors, and one of the simplest is to make a garden apron. These aprons are simple to make and perfect for people who want to get their hands dirty but don’t want to spend hours in the garden. Here are five easy steps to help you make your garden apron.
Choose the suitable Fabric.
There’s nothing better than a good apron when enjoying happy gardening. Select the suitable fabric for the purpose, and you’ll be able to put your best foot forward. I always focus on the color, shape, and pockets that best accommodate my gardening outfit. Additionally, ensure the fabric is sturdy and wrinkle-resistant – no one wants an apron that won’t hold up to a bit of wear and tear. With a little preparation, you can whip up a perfect gardening apron in no time!
Cut the material Properly.
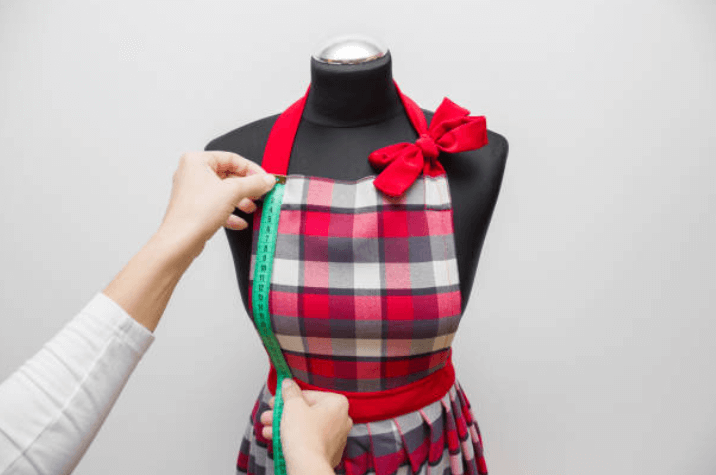
It is crucial to cut out the correct size when measuring fabric. You can trace around the person’s body with a pencil or ruler. Once you have determined the right size, you can start cutting out the fabric using standard seam allowances. It is also helpful to double-check your measurements before starting to sew to avoid surprises later on.
Before you can get started, you’ll need to take some measurements of the person you’re making the apron for. Here’s what you’ll need to measure:
1. Start determining the length from the collar to the knees. This measuring will be the length of the apron.
2. Measure the width from side to side around the hips. This assessment will be the width of the apron.
3. Assess the width from one arm to another, which will be the top width of the apron.
4. Finally, calculate from collar to waist. This assessment will be the distance from the top of the apron to where the straps will go.
Measure around the neck to find a manageable strap length, then add approximately 4 cm (1.5 inches). If the straps are long enough, they’ve been put over your head. There’s about 1.5″ of strap hanging down on either side of the apron.
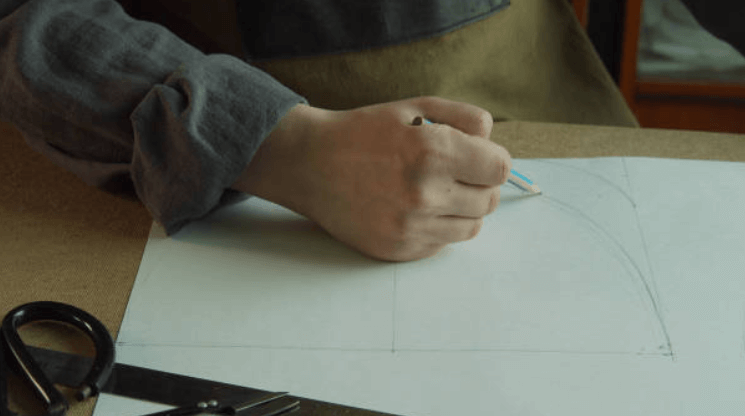
Cut the main apron shape.
To make a simple, elegant apron, start by folding your main fabric in half. Then, measure from the fold at the top half of measurement C. For example, if the C measurement is 12 cm, you would measure it 5 cm from the fold. Place a pin here.
Next, measure down from the top edge of the longer side of the fabric – on the open borders – measurement D. If your D measurement is 27 cm, you would measure down 10.5 cm from the top edge. Place another pin here.
Finally, cut through both layers of fabric in a curved shape from pin to pin. Voila! You now have a beautiful, one-of-a-kind skirt.
- Cut a rectangle out of your main fabric piece that is the same size as your desired apron shape. Make sure to allow plenty of excess fabric to seam it together later easily.
- Next, cut through both layers of fabric at regular intervals with a curved cutting edge from pin to pin (this will create the neckline and waistband). It is important to keep consistent curves throughout; if you don’t, the seams won’t line up correctly, and your project will look uneven.
Wrap up the edges
Start by securing the top of the apron piece with a French seam. You’ll be stitching from the side to create a hem, then taking your piecing tape and marking where you’ll need to stop for your seam allowance.
Turn right side out and press gently along both marked lines.
Perfect strap
For each strap, follow these steps:
- Take the slight edge and fold it over.
- Then, bend both long sides into the center.
- Next, it proceeds to one side and folds over the other to hide the fresh edges.
- Finally, top-sew around all four boundaries, making sure to fit in the other short end so that its fresh edge is hidden.
Attach the straps to the Garden apron
To attach the straps to your garden apron, first lay the apron flat. Then, take the two straps and the long neck strap and pin them to the back curves of the apron. As soon as all three straps are in place, stitch each one firmly by sewing a square with a cross through the center to meet the main apron. This process will ensure that your straps stay in place no matter what you’re gardening on the lawn.
How to make a sturdy and durable apron?
Aprons may not be a new trend, but they’ve made a comeback in the last few years. And for a good reason – apron-wearing cooks look professional and stylish, no matter what they’re cooking up! Once you’ve made your apron, dress it up or down – the choice is yours! Wear apron-style clothing like apron skirts or an apron shirt for a more rustic look.

For a more formal feel, go for apron-style clothing that ties at the waist. Aprons are also a great way to add personality and flair to any kitchen. Whether you’re cooking up a storm or need a place to store your aprons, apron hooks are a great solution. And last but not least, aprons are perfect for protecting your clothes from spills and messes. So go ahead – put on your apron and get cooking!
10 Sewing tips for the garden apron
Gardening can be a sweaty, tiring experience. That’s why it’s so important to have stylish clothing that can help you stay comfortable and stylish. That’s where a gardening apron comes in! This versatile piece can be worn for various reasons – from gardening to a casual day at the beach. Whether you go for a traditional apron style or a more whimsical one, there are many ways to embellish it. Here are ten tips for you-
- When measuring your fabric, use the width of your hips or the circumference of your waist.
- Cutting out apron patterns can be simplified by drawing them on several pieces before designing the final pattern onto one piece of paper.
- If you use bias binding, make sure to baste it in place as you sew, so it doesn’t shift during wear and tear later on!
- When sewing hems, necklines, and other seam allowances, use the right sides to minimize edge show-through (a common issue with interfacing).
- Make sure all zippers line up ideally before sewing them shut – try using a zipper foot if available!
- Use pins instead of fusible webbing when attaching buttons since they won’t fray as batting will over time and allow for more creativity in design choices down the road, aka no more crooked buttons!
- When quilting around curves, the start center is often ideal for creating even tension without puckering or stretching; click once per inch around each curve as you go (assuming rulers aren’t too heavy to hold while walking!). Stitches in the center keep quilting stitches from closing 1/2 to 3/8″ on each side, reducing puckering and stretch.
- When searching your fabric for apron filaments, try using an unscented fabric softener instead of one with an added scent (like lavender). This process will allow for easier ironing later on. Iron it this way, then drape the apron on your furniture and spray it with an unscented fabric or pressing spray (available at craft stores) before ironing. The moisture from steaming will help set up wrinkles more quickly, allowing you to use less pressure and still get them pressed out in one shot!
- When choosing thread for buttonholes, check that the type is similar before going through all of your buttons & lines to match the colors. If you buy the same brand, if it’s different from what else is in your thread box (like cotton vs. spandex), then choose a color that closely matches something used, more usually around your sewing room.
- Once you have pinned & stitched on all buttonholes, double-check for stray threads & mishaps by running through them several times backward & forwards before washing to ensure they are safely tucked back along their seam. Or, as we used to say, “thread-safe!”
What is a garden apron?
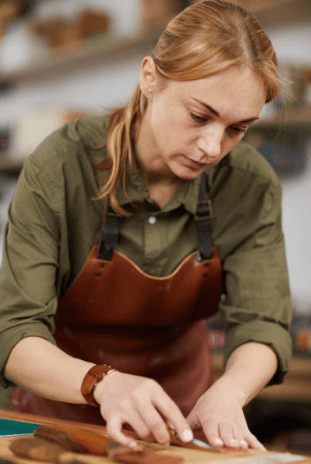
A garden apron is an essential piece of gardening attire, and it helps protect you from the sun, wind, and rain while working in your garden. The apron also has side pockets to hold tools or other gardening materials.
Choosing a durable and waterproof fabric is essential not to become ruined by sweat or tears. Additionally, find one with elastic properties to fit comfortably and provide complete coverage of your entire body. A good option may be cotton canvas, which can get wrinkles out quickly and resist moisture absorption.
What should be put in the apron’s pockets?
You can put many things in the pockets of your garden apron, including gloves, seed packets, and rain gear. That is because gardening can be pretty wet and muddy work, so it’s crucial to have everything you need in inclement weather.
Additionally, when planting seeds or purchasing fresh vegetables from the market, it is helpful to keep your wallet close by so that you don’t run out of money unexpectedly. And finally, if any pests or diseases lurk around your garden plants, having some gloves and insect repellent on hand will help protect them from harm.
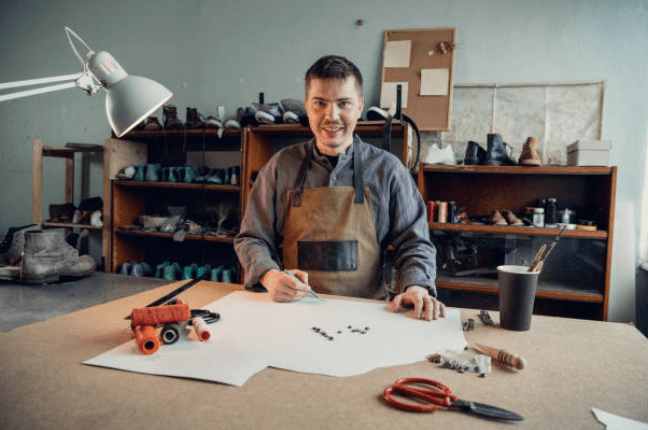
What types of materials can be used to make a gardening apron?
Gardening aprons are made from various materials, including cotton, linen, or knitted fabric. It is essential to choose a durable and comfortable material to wear. Additionally, ensure that the fit is snug but not too tight so that dirt and soil don’t get trapped between the fabric folds.
To create an attractive design, you can add colorful stripes or patches onto the apron using thread or fabric glue. You also have the option of adding pockets for storage tools or seeds. And lastly, consider embellishing your apron with flowers or leaves using henna powder, paintbrush strokes, beads, sequins, etc.
No matter what type of gardening you do (flowering indoors/outdoors), having a sturdy clothing item like an apron will help keep you protected from harmful elements. At the same time, you work diligently in your garden!
What should you avoid when wearing a gardening apron?
The most important thing to avoid when wearing a gardening apron is getting dirt and pesticides on your clothes. An apron will help keep you clean and protect your clothing from becoming dirty or stained.
- Avoid wearing a gardening apron if you are allergic to any ingredients.
- Always avoid getting it caught on your clothes or hair when you’re pulling weeds or planting flowers, and be sure to tie the strings loosely so that they don’t get twisted around your fingers
- make sure the fabric is light and breathable so that you aren’t overheating while working in hot weather conditions
- choose a color that matches your garden outfit, and keep an extra one on hand just in case yours gets dirty or damaged
- avoid wearing a flower in your hair if you intend on gardening. If you want to wear your hair up, wait until your gardening session is finished
- dusting powder on a garden each time it gets dirtied can make the fabric of an apron stiff and unforgiving, so be sure that the mix between cornstarch and powdered sugar remains soft
- if working with moist vegetables or flowers, change out of your work clothes as soon as possible or wash them before doing cleaning tasks outdoors
- wear appropriate work shoes and clothes, so you don’t get hurt while working in your flowerbeds! Shoes and clothing can be stinky, making the job even more difficult.
- Wash your gardening tools, containers, etc., immediately after using them cleanly (this includes kitchen foods such as eggs).
What is the best type of apron for gardening?
Many different aprons can be used for gardening, but an excellent all-purpose option may be a garden apron. This type of apron has ties at the waist and is made from durable fabric resistant to stains and tears. It also has shoulder straps for added support, so you can work comfortably without worrying about being too hot or uncomfortable.
Another great feature of a garden apron is that they come in different sizes and styles, so you can find one that best suits your needs.
Traditional aprons with attached pockets and drawstrings at the neckline and stylish aprons with shorter necks and integrated straps make it easier to move around while working. Plus, there are plenty of colorful options available too!
So whichever type of apron you choose, make sure it is comfortable enough to wear all day long while doing heavy labor like planting seeds or tilling the soil.
How often should I clean a garden apron?
It would help if you cleaned your apron according to the manufacturer’s instructions. Those made from synthetic materials may only need to be cleaned once or twice per year, while others made from natural materials may need to be cleaned more frequently. As long as the apron is kept clean and free of debris, it should serve its purpose well.
How do I clean my gardening apron?
When it comes to cleaning your gardening apron, there are a few essential steps that you should follow:
- Remove any excess leaves or dried residue with a leaf blower or vacuum cleaner before washing the apron in cold water and soap.
- Hang the apron out to dry on a hanger or line it up next to the sun so that the fabric dries quickly and doesn’t absorb moisture from the ground.
- Once the material has dried completely, you can wash it in warm water with a mild detergent.
- Be sure to inspect the tensions of all snaps and tapes before each use for wear or tear and any signs that might indicate that the stitches are coming apart, such as fraying edges at seams or underarm stains from dirtballs on clothing underneath your gardening apron.
- It would be best to wash the apron at least once yearly, whether manufactured from synthetic or natural materials. When washing your gardening apron, to ensure that you do not damage the fabric permanently, use good quality detergent with bleach in conjunction with cleaning and cold water and gentle machine/handling methods while rinsing after each wash cycle.
What should I do if my apron gets stained?
If your apron gets stained, follow these steps:
- Remove the apron from your body as quickly as possible and place it in a clean, dry area.
- Wipe off the stain with a cloth or a Napkin.
- If the stain is on a fabric section of the apron, soak the fabric in a solution of one part hydrogen peroxide to ten parts water for about fifteen minutes.
- Rinse the fabric off and dry it thoroughly.
How do I care for my apron?
When it comes to cleaning your gardening apron, there are a few crucial steps that you should follow.
1. Keep it clean and stain-free- Wipe the apron with a dry cloth immediately after use to prevent food residue from building up. If spills do occur, dab them up quickly with a damp cloth before they can dry out. Never pour water directly onto the fabric because this will only cause deterioration.
2. Wash in cold water- Machine wash on a gentle cycle using mild soap and dishwashing liquid, then rinse well before Hang drying or air drying (if possible). Do not bleach!
3. Tumble dry low for best results – To avoid shrinkage, tumble your aprons gently between gentle cycles on low heat until full dryer than when you initially obtained them (usually two to three weeks).
What is the perfect apron size?
Here are a few guidelines that may help you to find the perfect gardening apron size:
-If you’re between 5’3″ and 5’10”, go for an apron below your hipbone.
-If you’re taller than 5’10”, go for an apron that falls about halfway down your leg.
-If you have large breasts or hips, go for an oversized apron to accommodate these areas.
Ultimately, it’s essential to try on the garment before buying it to ensure that it fits well and covers all your bases.
What are the best ways to store an apron?
There are many different ways to store a gardening apron, and the most important thing is to find one that is comfortable and fits well. One option is to put it in the washing machine on a gentle cycle with soap. Another option is to hang it up outdoors where it can air out.
And lastly, you can also keep it folded up and stored in an easily accessible place indoors.
When choosing which method to use, make sure that your apron will be able to withstand being exposed to moisture and dirt. Additionally, make sure the fabric works well if there are spills or drips so that nothing gets stains or dirt stuck on the material.
When it comes to gardening, having a suitable apron is essential for protection against dirt and insects. Here are three of the best ways to store your gardening apron:
1. Put it in the dryer on low heat– This will help remove any moisture or sweat from the fabric, which would otherwise attract bugs and other pests.
2. Hang it up outdoors– This will allow air circulation and help keep the fabric fresh and free of pests.
3. Invest in a new fabric– If you are after a more practical and long-wearing type of apron to use year-round, then look into buying an iron-on polyester (or other similar sheets) to help protect your investment.
What should I do if my apron starts to fall off?
If your apron starts to fall off, there may be several reasons. First, it is possible that the fabric has begun to stretch and is no longer fitting snugly around your waist, and this can happen over time as you wear the apron more and more often.
Second, it could be due to poor laundering practices – make sure you wash it in hot water and add detergent designed explicitly for aprons. And finally, if there are any holes or tears in the fabric, they will allow water and dirt into the garment, which will cause it to deteriorate even faster.
If these solutions don’t work, or if you just want your apron back on as soon as possible (or ever!), you might need to consider replacing it with a new one. There are many affordable options available on online retailers like Amazon or eBay, so take some time to compare prices before purchasing.
How to make simple aprons without sewing?
There are a few different ways to make simple aprons without sewing. The easiest way is to wear an old T-shirt or dress shirt as your apron base. You can then hem the bottom and sides of the shirt, and voila! You have an easy-to-use apron that will protect your clothes from dirt and stains.
Another option is to find an old piece of fabric that you love and cut it into desired measurements. Then, sew on pockets, ties at the waistband, or any other features that you may want. And finally, if you don’t feel like seaming anything yourself, there are also readymade aprons available online or in stores. Just be sure to choose one with sufficient durability so you won’t have to replace it often!
How to sew an apron with a free printable apron pattern?
Sewing an apron is a great way to add a bit of fun and flair to your wardrobe. And with a free printable apron pattern, you can be up and sewing in no time! The instructions for this simple project are easy to follow, and the result will be something stylish that you can wear both at home and out.
The basic steps involved in this project include cutting out the fabrications (sizes XXS-3XL), assembling the pieces, and attaching the skirt tie belt. It would help if you also sewed on snaps at regular intervals and the apron’s front panel for closure. Once everything is finished, enjoy your newly sewn garment!
Final Words
Creating a garden apron is simple and easy with the help of our ten sewing tips and 5 step guide. Once you have mastered the basics, it’s time to experiment with different materials to achieve the perfect design for your own garden.
Don’t forget to include an ideal strap to ensure your apron stays in place! Please feel free to leave a comment below if you have any further questions. The apron size should fit the waist size of the person wearing it.

I love gardening and hope you enjoy reading my post as much as I enjoy writing it. I focus on plant-based living and believe that you will be healthier and happier by incorporating more plant-based foods into your diet. By providing helpful tips and advice on everything from garden design to growing techniques, I want to help make gardening easier for everyone.
Pingback: How to Choose a Good Linen Garden Apron? The Ultimate Guide Inside